
Eyes - mirror of the soul. Part: portrait afterwork. Recommendations.
|
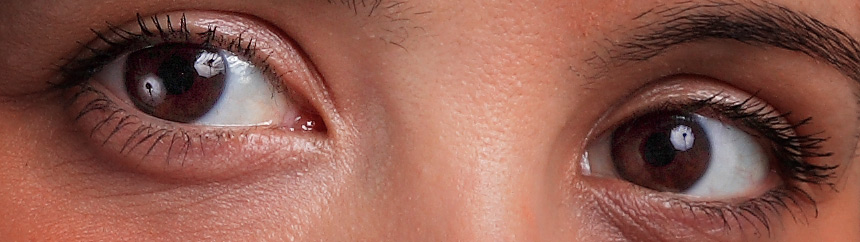
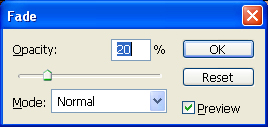
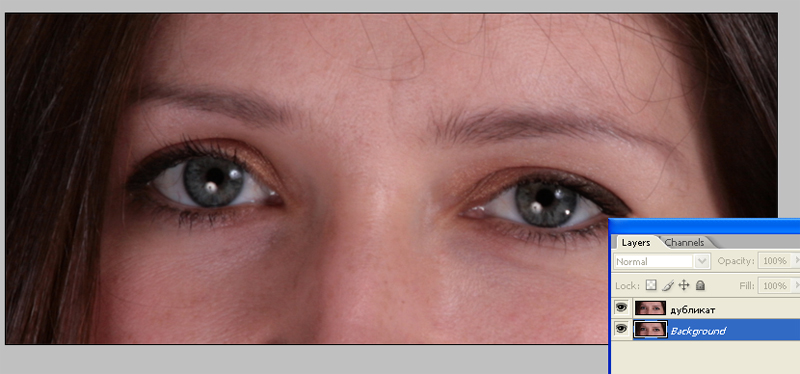
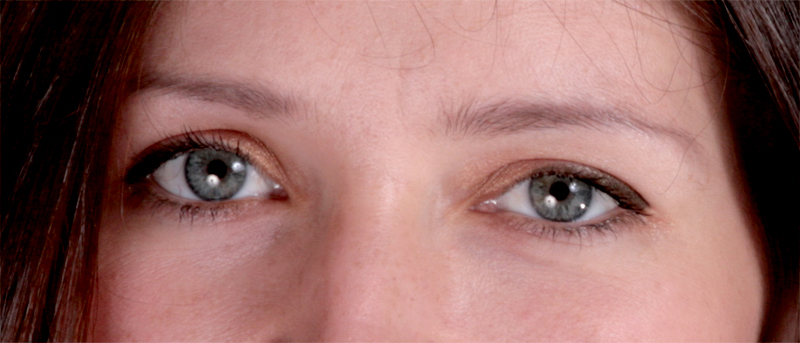
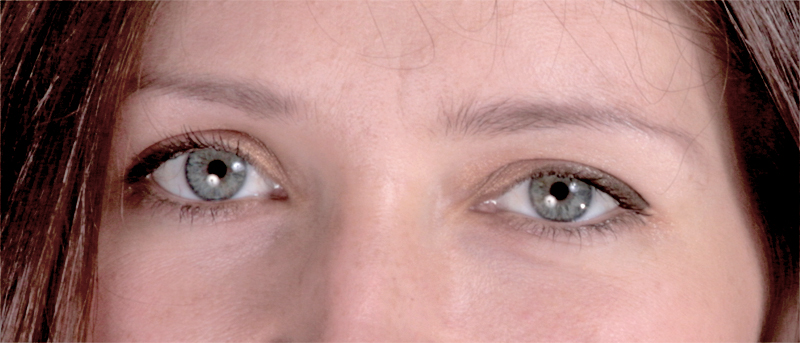
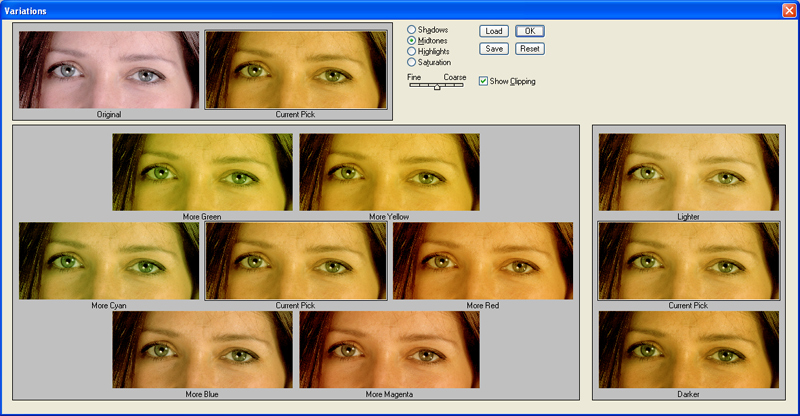
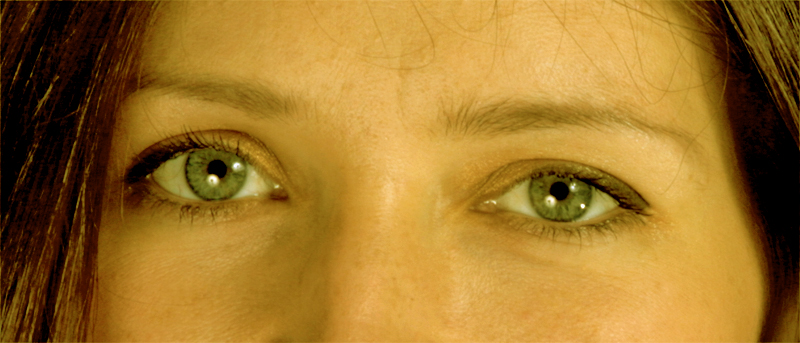
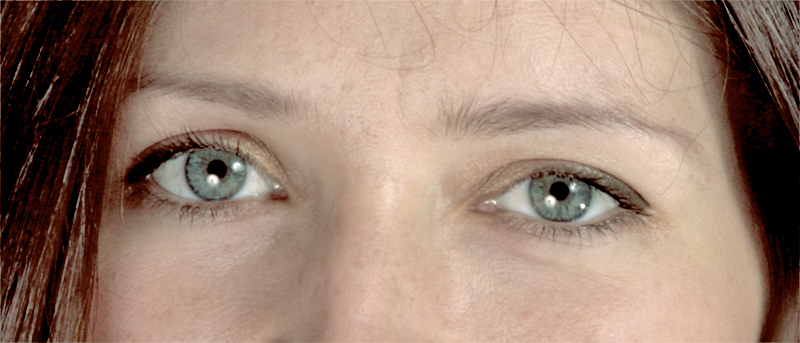
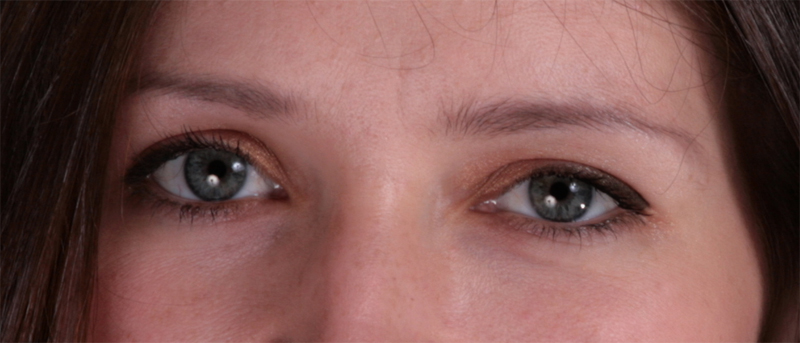
While taking a portrait we are trying to catch the most unusual and expressive way of light on special parts of object. Looking for an interesting light-to-dark pattern we can neglect of trivial details. It seems incredible but namely eyes could be the trivial details if your goal is not taking a picture of eyes. From the other side this is the detail that transfers person emotion as well as creates spirit of the image. What should we do? In spite of the miracle light we use at the studio it is advisable to do eyes afterwork to create person image more expressive. It could be done by using additional point light source (directed to the eyes). An object generally is in motion therefore this method is not suitable. It would be easier to improve the image in editor. Let us imagine we are ophthalmologists and experiment on the proposed eyes image. Then go to Image>Adjustment>levels and move right and left runners approximately 0,5cm (so we create high dynamic range margin) and then move the middle runner as it showed at the image. 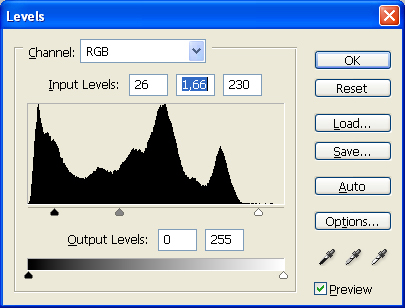 As a result we get following image: What do we want to get? We try to get “intensity eyes”. Performing all following steps you should keep your attention only at eyes even if all other image details would become unreal. We will improve it later. In other words “intensity eyes” is the starting point of the image light-to-dark pattern. Keeping active (blue color at the Layers panel) “Duplicate layer” we go to Image>adjastment>shadowhightlight and change adjustments as it showed at the picture. 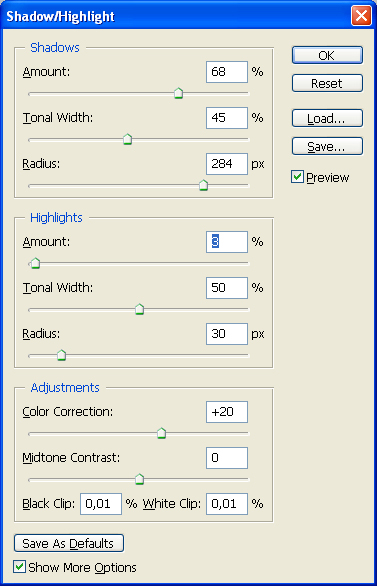 As a result we get following image: Now we should delete redness around eyes Image>Adjastment>Replace Color. Click with eyedropper tool at the redness and move Saturation runner to the left. Fuzziness should be as at the picture. 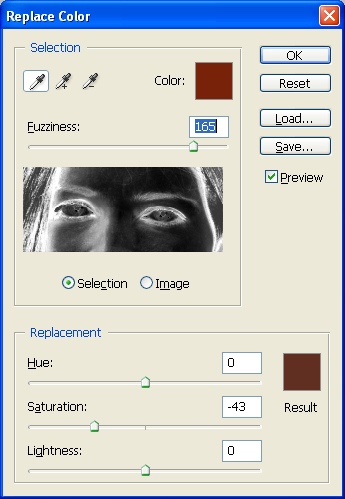 So we have: Then add to the fragment additional color (e.g. yellow). Earlier we removed some red hue which now is compensated by yellow color. Go to Image>Adjastment>Variations and choose More Yellow and then darken. So we have: There is a question: “It is too yellow, isn’t it?” Surely, the image is too yellow! Therefore we go to Image>Fade and move the runner as it showed at the picture. |
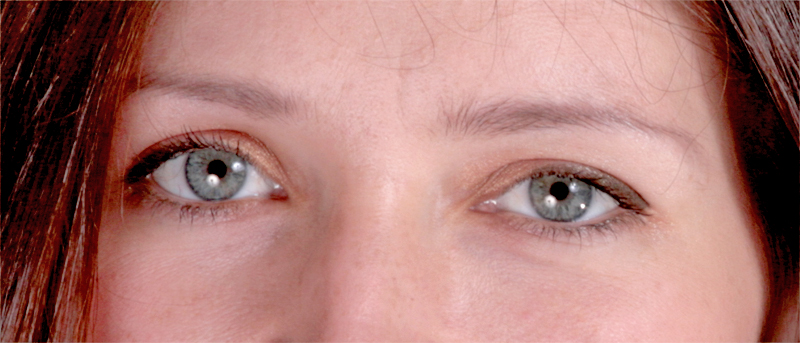
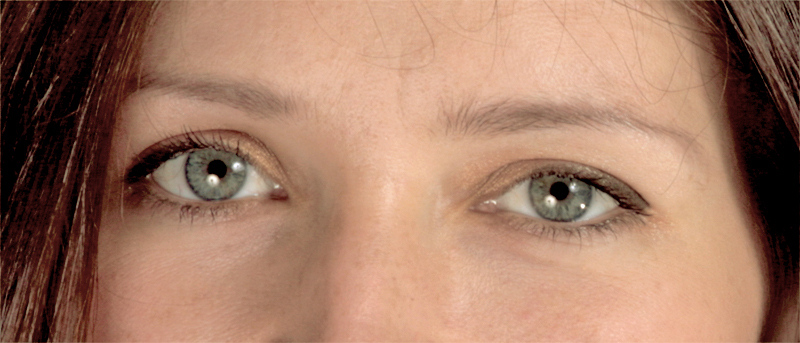
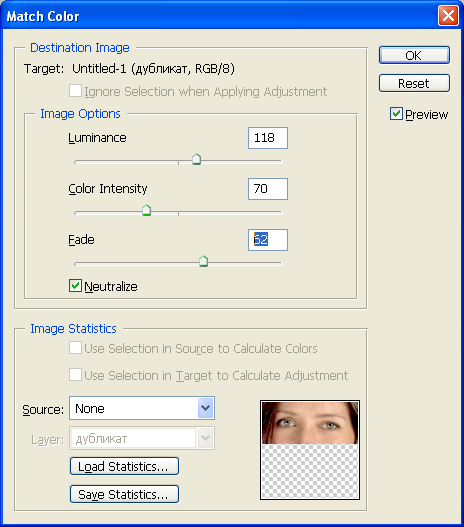
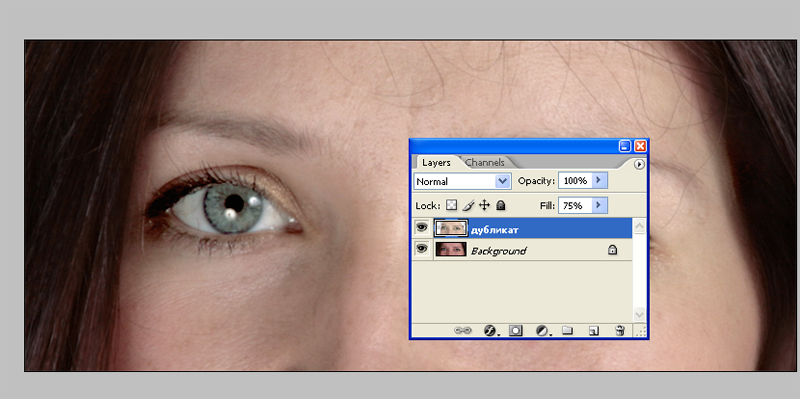
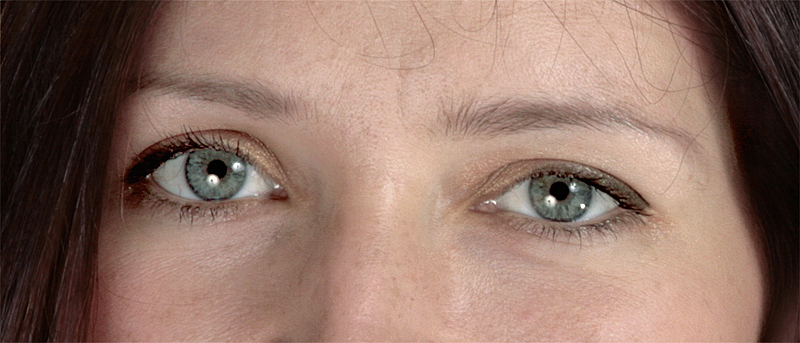
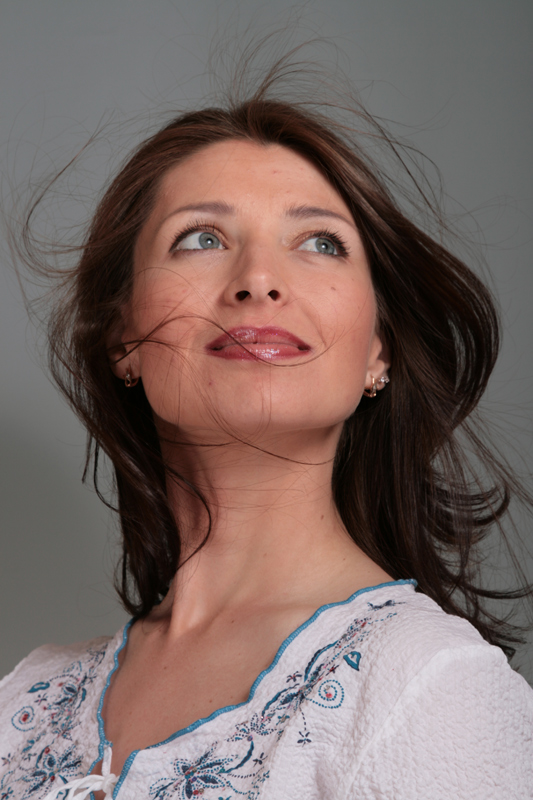
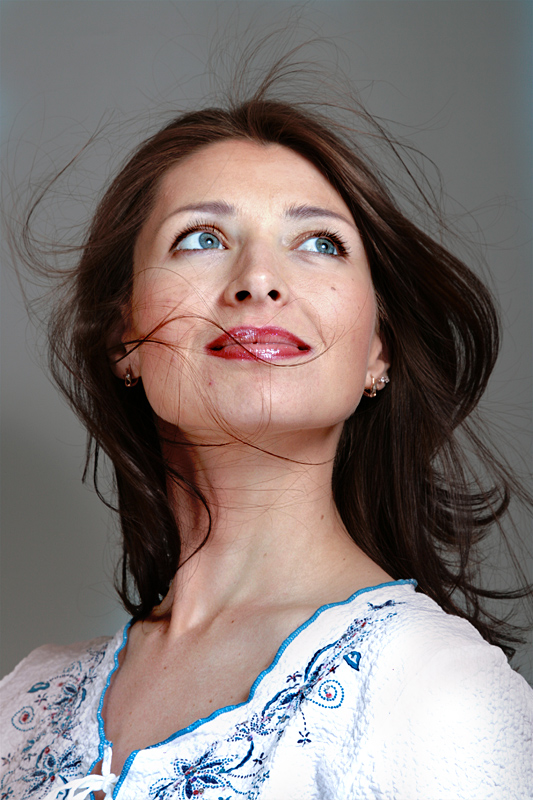
 By this we cancel outcome of preceding action (USEFUL!) and get: So we have: Then we repeat actions of levels one more time after this we repeat actions Shadow/HighLight. Then we go to Image>Adjastment>Match Color and at the open window mark Neutralise, moving runner as it showed at the picture. So we have: Now we change Duplicate Layer characteristics: opacity 75% and clean by Eraser tool places which are oversaturated of color (as a rule these are border zones of hair, etc.). Now we merge layers and use Smart Sharp as we like (there is a great advantage, after such actions we have a large dynamic margin and even in case of considerable increasing sharpness no artifacts would appear). Note: I am not aimed at to show you how eyes should be “expressed” but try to show you tools which could be used to get such result. Experimenting on image you can finish editing any stage you want and get your individual result. As a result: before – now: This is the way how similar editing looks at full-size image. I deliberately did not draw your attention to all others details of the picture besides eyes. Final image for sure has a lot of details to edit. We have reached goal, she has a “clear glance” as our ancestors used to tell! PS: The same actions should be carried out for eyebrows, lips and hair. To be continued Dmitry Zhamkov 2007 |

Copyright © 2008-2025 www.zhamkov.com
Click on image to view full size