Basis of portrait picture at studio.
|
Portrait pictures could be divided into 3 main directions:
There are a few sub-directions: children portrait, wedding portrait, family portrait, advertising portrait etc. Each of them has its own individual features but in general the rules of shooting or the fist three are the same: genre, art and photo-portrait or they will be created with a help of combined technique. In any case the result should be suitable for owner, recognizable and transfer uniqueness of the model, face features, mimicry, mood and character. Start form preparing the model. Below is information you have to explain to the model: 1st , it is necessary to have a good sleep. It will influence at face colour and fresh appearance. Do not drink a lot of liquid before shooting day, especially do not drink an alcohol. Bad result could be caused by extra tan (skin looks elder at the picture). If there is no professional make-up artist so advise the model to avoid aggressive make-up in advance and recommend to make-up immediately before shooting. Anticipating the future picture object image you can correct make-up process and preliminary retouch skin problems. Keep in mind that in one hour shooting you should correct make up (even professional make-up). You should not try to hide folds, wrinkles, pimples under thick layers of make-up – it would be easier done with graphics editor program. 2nd . To create environment and object image you need properties and additional clothes (even if you decide to shoot nude). Interesting pictures could be made if use hats, heavy and bright bijouterie, textile curtain. Ask the model to bring maximum clothes – you will get full play for the creativity as well as the model will get a chance to revise her clothes. Try to use monotonous textile with big pattern. This textile is more effective and universal for shooting. 3rd. Break the ice! Make the model acquaintance. Try to find topic for conversation. Discuss, joke – just do everything the model feel herself/himself at easy. The game “Photo session” is for two persons: the photographer and the model. If it is possible take a test shooting: you will see model individual features, mimicry, gestures, skin reflection, required lighting characteristics and get to know the mode. About lighting benefits. Lighting forms process of shooting (“light” and “writing”). Thus we have to learn basis rules how to operate the light to express the model in a full and right way. Shooting lightning could be divided into three types:
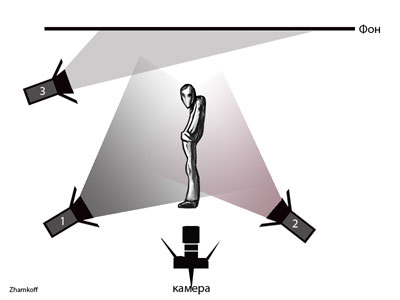
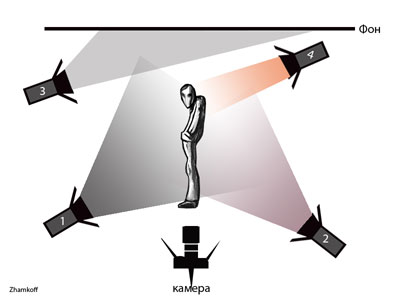
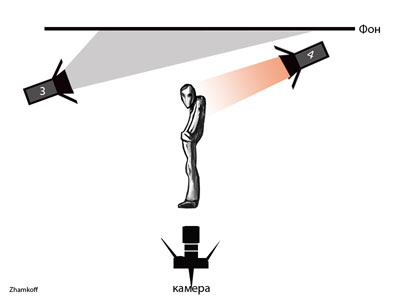
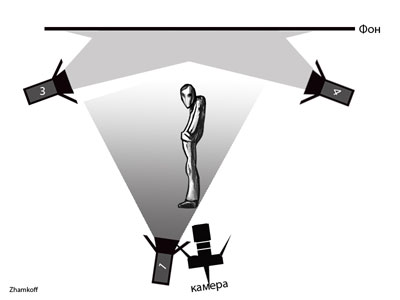
Natural lightning is always fixed. 2nd and 3rd types could be fixed and impulse. Basis rules of lightning spreading for all three types are similar. Natural lightning is normally cheaper. Studio lightning I thought a lot about what lightning method could thoroughly describe all process of light-to-dark technologies and concluded that laboratory and studio lightning. Let us start! Typical scheme of lightning equipment positioning is on the picture:
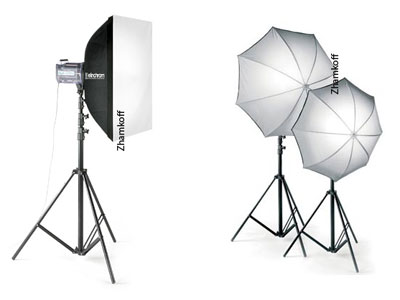
Device №1 is a source of draw lightning (SDL), device №2 is a source of fill lightning (SFL)and device №3 – background lighter (BL). “Камера” is your photocamera and “фон” is background. Commonly lighter with soft-boxes or lighter with transparent umbrellas are used as SDL (see the picture).
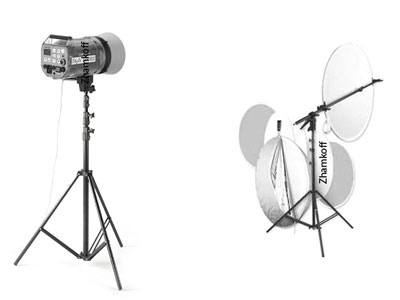
Both of them provide you with diffuse and uniformly distributed light without flares. generally the same sources or light-discs (reflectors) are used as SFL. As filling light exposure is 2 spacing less than drawing light so reflected drawing colour would be enough to fill. Studio lighters with shutters or eggcrate packings could be used as BL (see the picture)
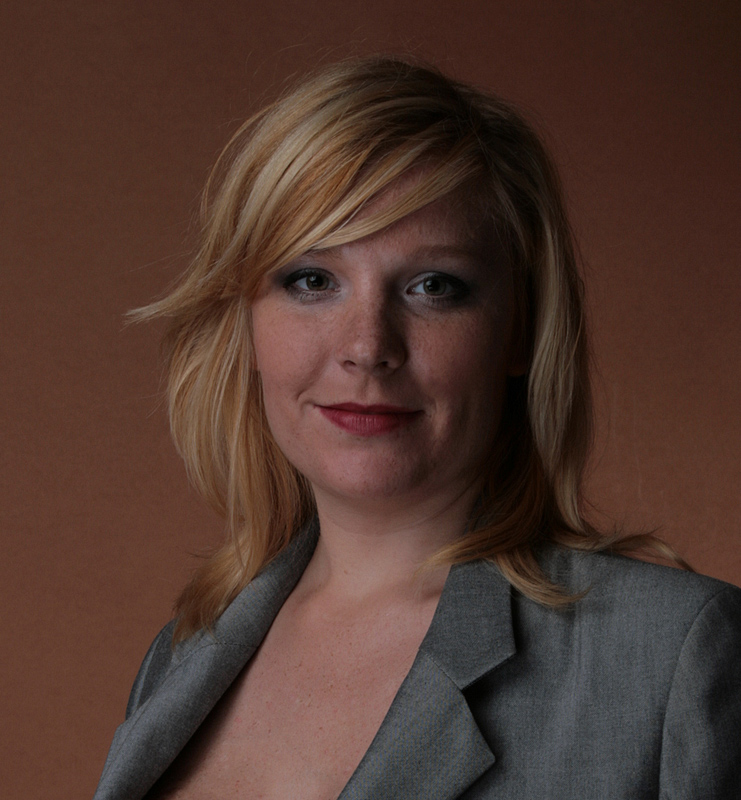
We have clarified what the lightning is. Now let us find out what it could be used for? Place device №1 of 45°C to the camera, the height is approximately 2 m (it lights to face from the left side top-down). Turn off the rest of lighters. We will draw with it at the object face until we get one half face lighter than another, one eye area is well lighten and light-to-dark zone looks like triangle. You should get something like below:
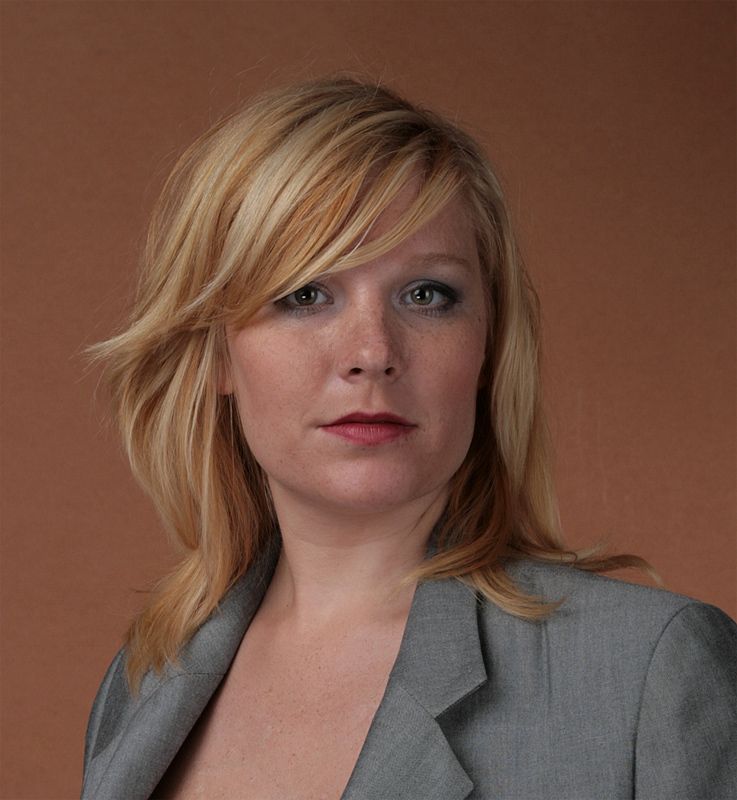
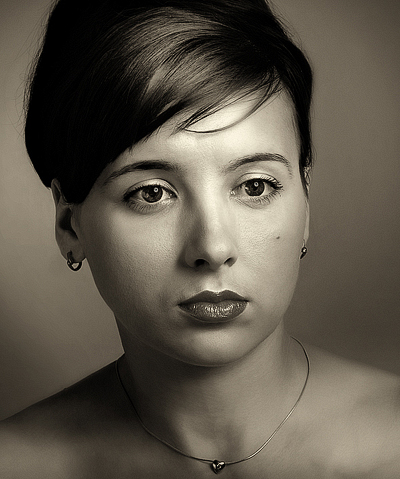
As soon as we get a “moon” turn on the 2nd source of lightning SFL and fill the 2nd half of the face (right half) with light to equalize lighting of two halves of the face (approximately 2 exposure spacing). SFL are to be placed symmetrically to SDL regarding to the camera. I recommend you to place it a bit lower the face level (lighting from the right upwards). Now we have:
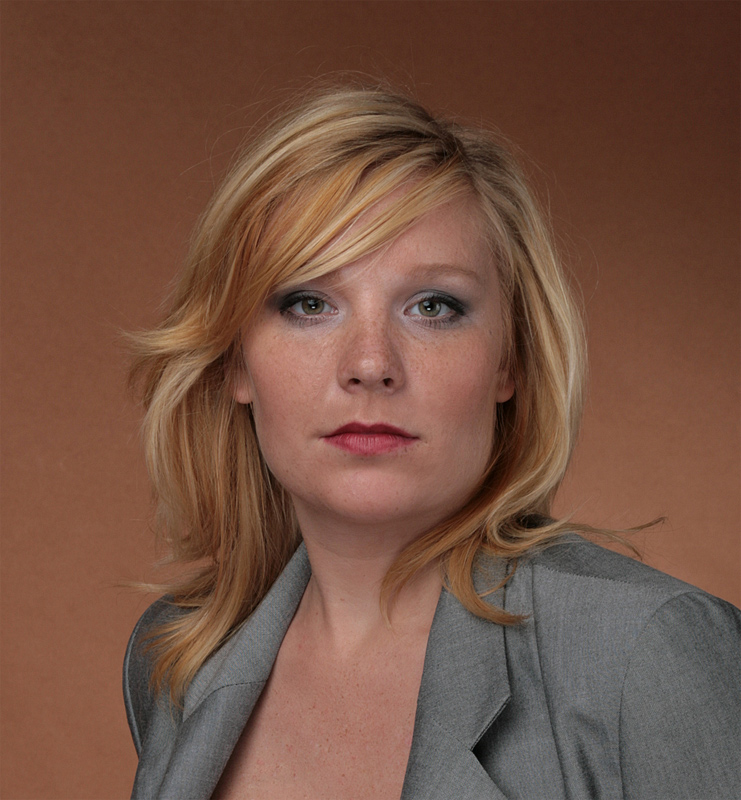
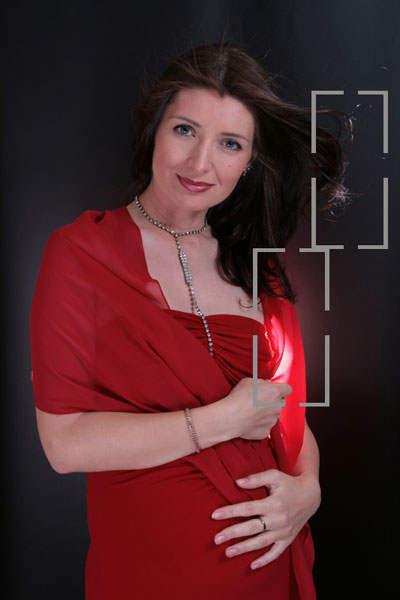
The object is lighted! But if we take a picture right now we will get well lightened face sticked to background. To avoid this turn on device №3 – BL. Its light is directed to background. Usually in portrait picture background area behind head and shoulders should be lightened. BL gives a volume to the picture! The result is:
Sometimes we use another device for shooting – device №4 – source of back lightning (SBL) .
It allows us to give the picture additional volume, highlight object halation – it essential while shooting a picture with a different colour background or when you shooting blond against white background. |
Watch closely for camera placing and object placing regarding this source of light. In case of incorrect placing there could arise some wrong results.
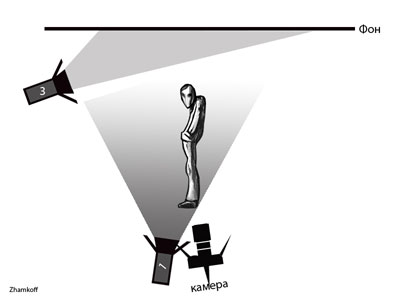
Below there are some more popular lightning methods. Every method is interesting in its own way and is used for specific type of shooting. This method could be used in shooting of nude body when it is essential to get object profile against lightened background.
This method is used in shooting of advertisement pictures and other glazed. One lightning source is placed close by the camera and directed straight to the object. The 2nd one lights background.
Result is following:
Another method -«High Key» or «light tonality». Another words, take a picture of blond against white background nearly without shades. Method is similar the previous but differs stronger background lightning.
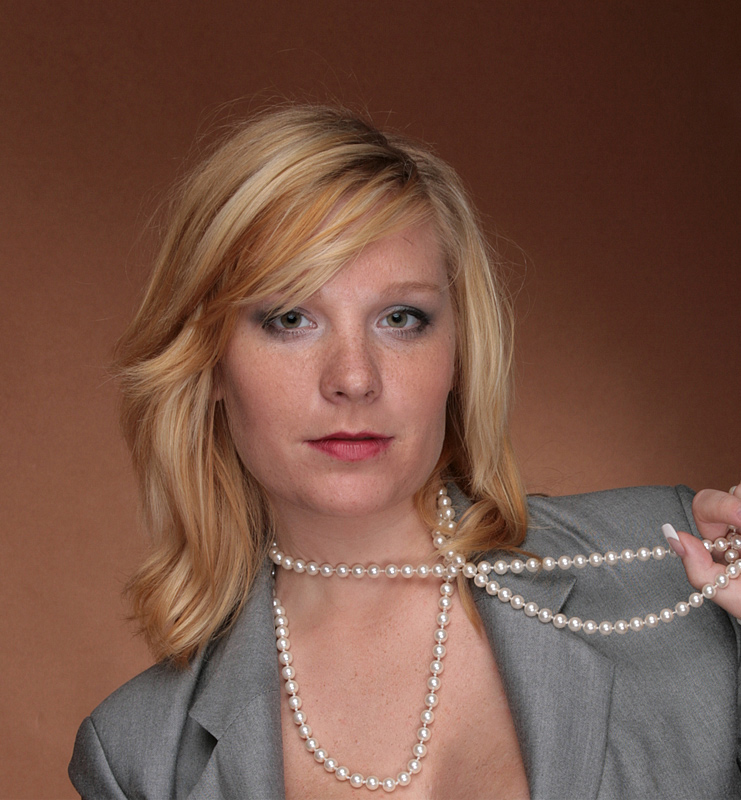
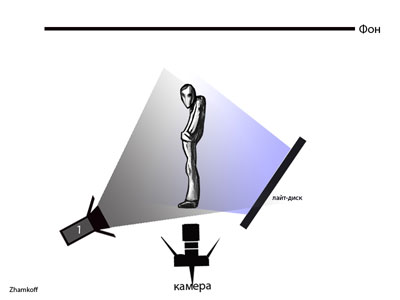
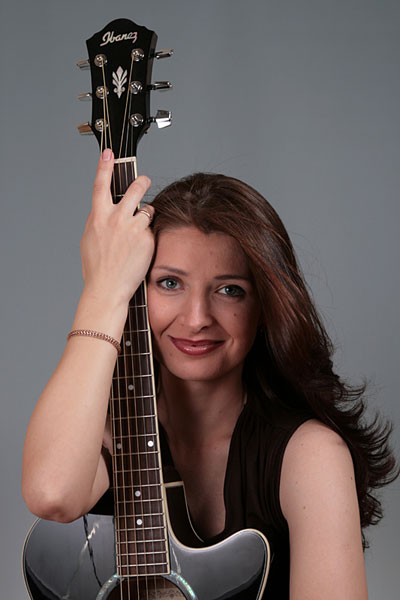
Another method – one of the easiest which requires minimum equipment. SDL – soft-box, SFL – light-disc (reflect the light form SDL).
This kind of lightning we get as the result.
These are only basis meanings and methods of lightning placing, you will learn the rest of by yourself during experiments. Some features in working with studio lightning. In shooting portraits I advise you to use impulse lighters because of the following reasons: 1st, when you use halogen lighters you should undress in 10 minutes since the beginning of shooting (temperature in the room will be very high because of 3-4 working halogen lighter). 2nd, constant bright light will cause the model narrow and red eyes. 3rd,the model soon became sweaty and get tired. You can avoid it by using flashes and impulse lighters. When you are working with impulse lighters you should take into account a few specific features:
Camera settings: «Help me!!!», said I myself when I first time stand in front of the lighters and tried to shoot a picture. That moment I understand that I do not know what settings are to be set at the camera. Fact of the matter was that I could not adjust camera setting using only a pilot lightning and I did not have flash-meter at that time. To determine starting point I recommend you: - forget about automatic and semiautomatic shooting modes. Choose “manual” mode at the camera. - ISO . It is only now dark. When the flash is activated the lightning would be good enough. Thus set minimum level – as for me I set it less than 100. The minimum level will save you from possible noises. - WB or white balance. I strongly recommend you to set it in accordance with colour temperature which indicated at your lighters. - Diaphragm. I advise you to start from F10 (regardless of lens speed), then you should correct diaphragm and exposure during the shooting. - Exposure. If you are shooting with your arms it is desirable to set more than 1/160 level. Keeping this level try to open/close diaphragm. Example.
Devices: - 3 source of lightning (SDL, SFL, BL)- ISO 100, F 11, 1/160, 5400К To be continued... Dmitry Zhamkov 2007 |